Great food photos drive clicks, saves, and orders; whether you’re posting a quick Instagram Story or building a full restaurant menu. This how-to guide breaks food photography into simple, repeatable steps: lighting, styling, composition, and camera settings you can use at home or on-location, plus a fast checklist to keep every shoot consistent.
What You Need (Gear & Prep)
You don’t need a studio to create mouthwatering images. Start with a clean setup, a plan for the dish, and a few tools that control light and camera shake.
Camera/Phone & Lenses (or focal lengths)
- Phone camera: Modern phones are excellent; especially if you can tap-to-focus and adjust exposure.
- DSLR/Mirrorless: A reliable step up if you need more control and consistency.
- Lens/focal length basics:
- 50mm (or equivalent) is a classic for food because it looks natural.
- 35mm works well for flat lays and tighter spaces, but watch for distortion at the edges.
- Macro is ideal for close-ups (crumbs, steam, glossy sauces).
- 50mm (or equivalent) is a classic for food because it looks natural.
Why it works: The right focal length keeps plates proportional and appetizing, without stretching edges or warping bowls
Must-have accessories (tripod, reflectors, diffuser)
- Tripod (full-size or tabletop): Stabilizes shots and helps you shoot with slower shutter speeds in low light.
- Reflector / white foam board: Bounces light back into shadows to soften contrast.
- Diffuser: A sheer curtain, parchment paper, or a proper diffusion panel spreads harsh window light into a soft glow.
- Basic props: Neutral plates, linen napkins, simple cutlery, and 1–2 background options (wood, stone, matte paper).
Why it works: Most “pro” food images aren’t about expensive cameras; they’re about controlled light and thoughtful styling.
Lighting for Food Photography
Lighting is everything. The goal is to create shape, texture, and color without harsh shadows or weird color casts.
Natural light (window, diffusion, reflector bounce)
Set up near a large window and turn off indoor lights. Place your dish so the window light comes from the side or slightly behind.
Try this quick setup:
- Put your table 1–3 feet from a window.
- Diffuse the light with a sheer curtain (or parchment paper taped safely to the window frame).
- Add a white foam board opposite the window to bounce light into shadows.
Why it works: Side light adds texture to crispy edges and glossy sauces. Diffusion softens highlights so food looks fresh, not harsh.
Artificial light (softbox, continuous LEDs; white balance)
If natural light isn’t consistent, use continuous LED lights or a softbox to mimic window light. Position the light like you would a window; side or back/side, and diffuse it.
Tips to keep color accurate:
- Set a consistent white balance (avoid auto if colors keep shifting).
- Avoid mixing warm restaurant bulbs with cooler LEDs.
Why it works: Artificial light gives you repeatable results; especially for restaurant work where timing and consistency matter.
Styling & Composition
Food styling and composition work together: styling makes the dish look “ready to eat,” and composition guides the viewer’s eye.
Color, props, negative space
- Choose 2–3 supporting colors (props/background) that make the food pop.
- Keep props simple: one fork, one napkin fold, a glass, don’t overcrowd.
- Leave negative space (empty areas) so the hero dish stands out.
Why it works: Simplicity reads as premium. Visual breathing room makes images more scroll-stopping and easier to use in ads or menus.
Angles: 45°, overhead (flat lay), eye-level
The angle you choose shapes how the food is perceived before anyone even notices the details. Different dishes benefit from different perspectives, so the goal is to match the angle to what you want to highlight.
Use the angle that fits the food:
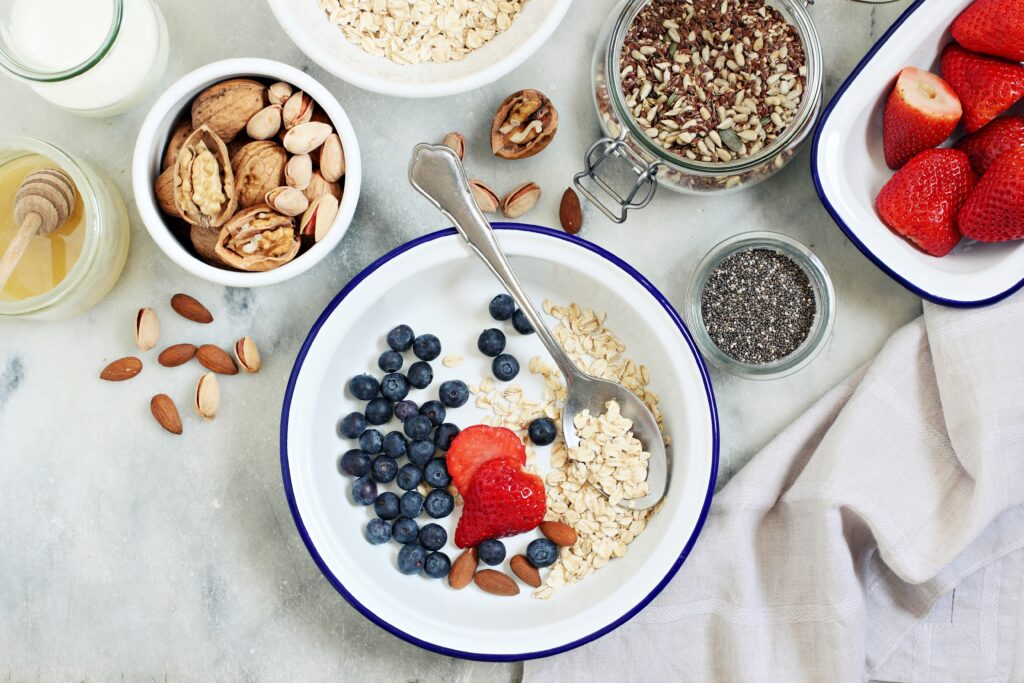
- Overhead (flat lay): Great for bowls, spreads, and multiple items (brunch boards, ingredients).
- 45° angle: The most versatile; ideal for plated meals and depth.
- Eye-level: Best for stacked foods (burgers, layer cakes) and drinks.
Why it works: The angle controls what looks dominant, height, layers, garnishes, or arrangement.
Visual hierarchy & leading lines
Strong food photos guide the eye instead of letting it wander. Visual hierarchy and subtle leading lines help viewers instantly understand what matters most in the frame.
Create a clear “hero”:
- Keep the sharpest focus on the main ingredient.
- Use cutlery, napkin folds, or ingredient trails as leading lines pointing toward the dish.
- Balance the frame: if the plate is heavy on one side, counter it with a small prop.
Why it works: Viewers decide what they’re looking at in under a second. Hierarchy prevents visual confusion.
Camera Settings (Phone or Camera)
You don’t need complicated gear or manual-mode mastery to get better food photos. A few core settings—whether you’re shooting on a phone or a camera—make a noticeable difference fast.
Aperture for food (f/2.8–f/5.6), ISO low, shutter + stability
If you’re on a camera:
- Aperture: Start around f/2.8–f/5.6 (sharp subject, pleasing background blur).
- ISO: Keep it low (as low as you can) to reduce noise.
- Shutter speed: Use a faster speed if handholding; if it’s slower, use a tripod.
Why it works: Slight background blur separates the dish from the scene, while low ISO keeps textures clean and appetizing.
Focus & exposure lock on phones
On phones:
- Tap the hero area (like the front edge of the dish).
- Use AE/AF lock if your phone supports it to prevent exposure shifts.
- Lower exposure slightly if highlights blow out on glossy sauces.
Why it works: Consistent focus and exposure make your edits faster and your feed more cohesive.
Shooting Scenarios
Different shooting environments call for different setups, but consistency matters more than complexity. These scenarios show how to get reliable results by keeping the setup simple and repeatable.
Home setup (single window, foam board bounce)
A simple home workflow:
- One window + diffuser + foam board.
- Use a neutral background.
- Shoot three angles: overhead, 45°, and a detail close-up.
Why it works: Limiting variables (light/background/angles) makes your shots look like a set, not random snapshots.
Restaurant (mixed light, quick staging, small tripod)
Restaurant shoots are less controlled and more time-sensitive than home setups. The goal isn’t perfection—it’s capturing freshness and mood before the moment passes.
Restaurants introduce speed and mixed lighting:
- Turn off overhead lights if possible (or move away from them).
- Use a small tabletop tripod for stability.
- Stage fast: wipe plate edges, add fresh garnish, and shoot immediately.
Why it works: Food fades fast, steam disappears, greens wilt, and sauces dry. Quick staging protects “freshness.”
Post-Processing Basics
Editing should support the photo, not announce itself. A few restrained adjustments can bring food back to how it looked in real life—fresh, balanced, and appetizing.
White balance, exposure, contrast, color cast
Start with subtle corrections:
- Fix white balance first (neutral plates should look neutral).
- Adjust exposure and contrast gently; avoid crunchy shadows.
- Watch for color casts (yellow/green from indoor bulbs).
Why it works: Natural-looking edits build trust; especially for restaurants where customers expect the dish to match reality.
Crop ratios for social (1:1, 4:5, 9:16)
How an image is cropped matters just as much as how it’s shot. Planning for the final placement upfront helps your photos look intentional across every platform.
Plan crops for where the image will live:
- 1:1 for grids
- 4:5 for maximum feed real estate
- 9:16 for Stories/Reels
Why it works: Cropping with intent keeps the hero dish centered and avoids cutting off key details.
Common Mistakes to Avoid
Most food photos don’t fail because of gear—they fail because of small, avoidable choices. Spotting these common mistakes early helps you fix issues fast and keep your shots looking natural and appetizing.
- Shooting under direct overhead lights (flat, unflattering, yellow casts).
- Skipping diffusion (harsh highlights and deep shadows).
- Overstyling with too many props.
- Using ultra-wide angles too close to the plate (distortion).
- Over-editing saturation until food looks unnatural.
Quick Checklist
When you’re shooting quickly, a simple checklist keeps you from missing the fundamentals. Run through this before you press the shutter, and you’ll avoid most common issues.
- Choose your angle: overhead, 45°, or eye-level
- Set up near a window or soft, diffused light
- Turn off mixed indoor lights
- Diffuse the light (sheer curtain/parchment)
- Add a reflector/foam board for shadow fill
- Clean plate edges and simplify props
- Lock focus and exposure (especially on phones)
- Keep ISO low; stabilize with a tripod
- Shoot wide, medium, and close-up variations
- Edit: correct white balance first, then exposure/contrast
The Bottom Line
With the right light, clean styling, and a few repeatable settings, food photography becomes a system; not a guessing game. If you want scroll-stopping visuals for menus, ads, and social, Purplegator can help with creative production, social media content, and campaign-ready design that matches your brand and drives results. Contact us today!
Related Reading